You can feel it on a windy night: cold air sneaking around the front door, a chill radiating from a window frame. Air leaks around doors and windows are among the largest sources of energy waste in a typical home — and also among the cheapest to fix. Weatherstripping is a weekend project with basic tools that pays back every single month on energy bills.
This guide covers finding your leaks, choosing the right weatherstripping material for each location, installation techniques for doors and windows, and how to verify your work actually sealed the gaps.
Step 1: Find the leaks
Do not guess — test. On a windy day, hold a lit incense stick or a thin piece of toilet paper near door and window perimeters; movement reveals air leaks precisely. (Use the incense carefully — it is a fire source; the toilet paper method is safer and nearly as sensitive.) Check the usual suspects: the bottom of exterior doors, the sides and top of door frames, window sashes where they meet the frame, and where window AC units or pet doors penetrate the envelope.
Also inspect existing weatherstripping: compressed, cracked, torn, or missing sections are obvious, but also look for daylight visible around a closed door — if you can see light, air is pouring through. Note that some “drafts” are actually cold surfaces radiating chill (single-pane windows) rather than air leaks; weatherstripping fixes air movement, not radiant cold. For the big picture on home energy waste, the U.S. Department of Energy publishes homeowner guidance at energy.gov.
Step 2: Choose the right material
Weatherstripping is not one product — different locations need different materials:
- V-strip (tension seal): springy plastic or metal folded into a V. Best for the sides and tops of double-hung and sliding windows and door frames. Durable, nearly invisible when installed, and excellent longevity.
- Felt: inexpensive and easy to install (usually adhesive or tacked), but the least durable — plan on replacing every year or two. Fine for low-traffic windows.
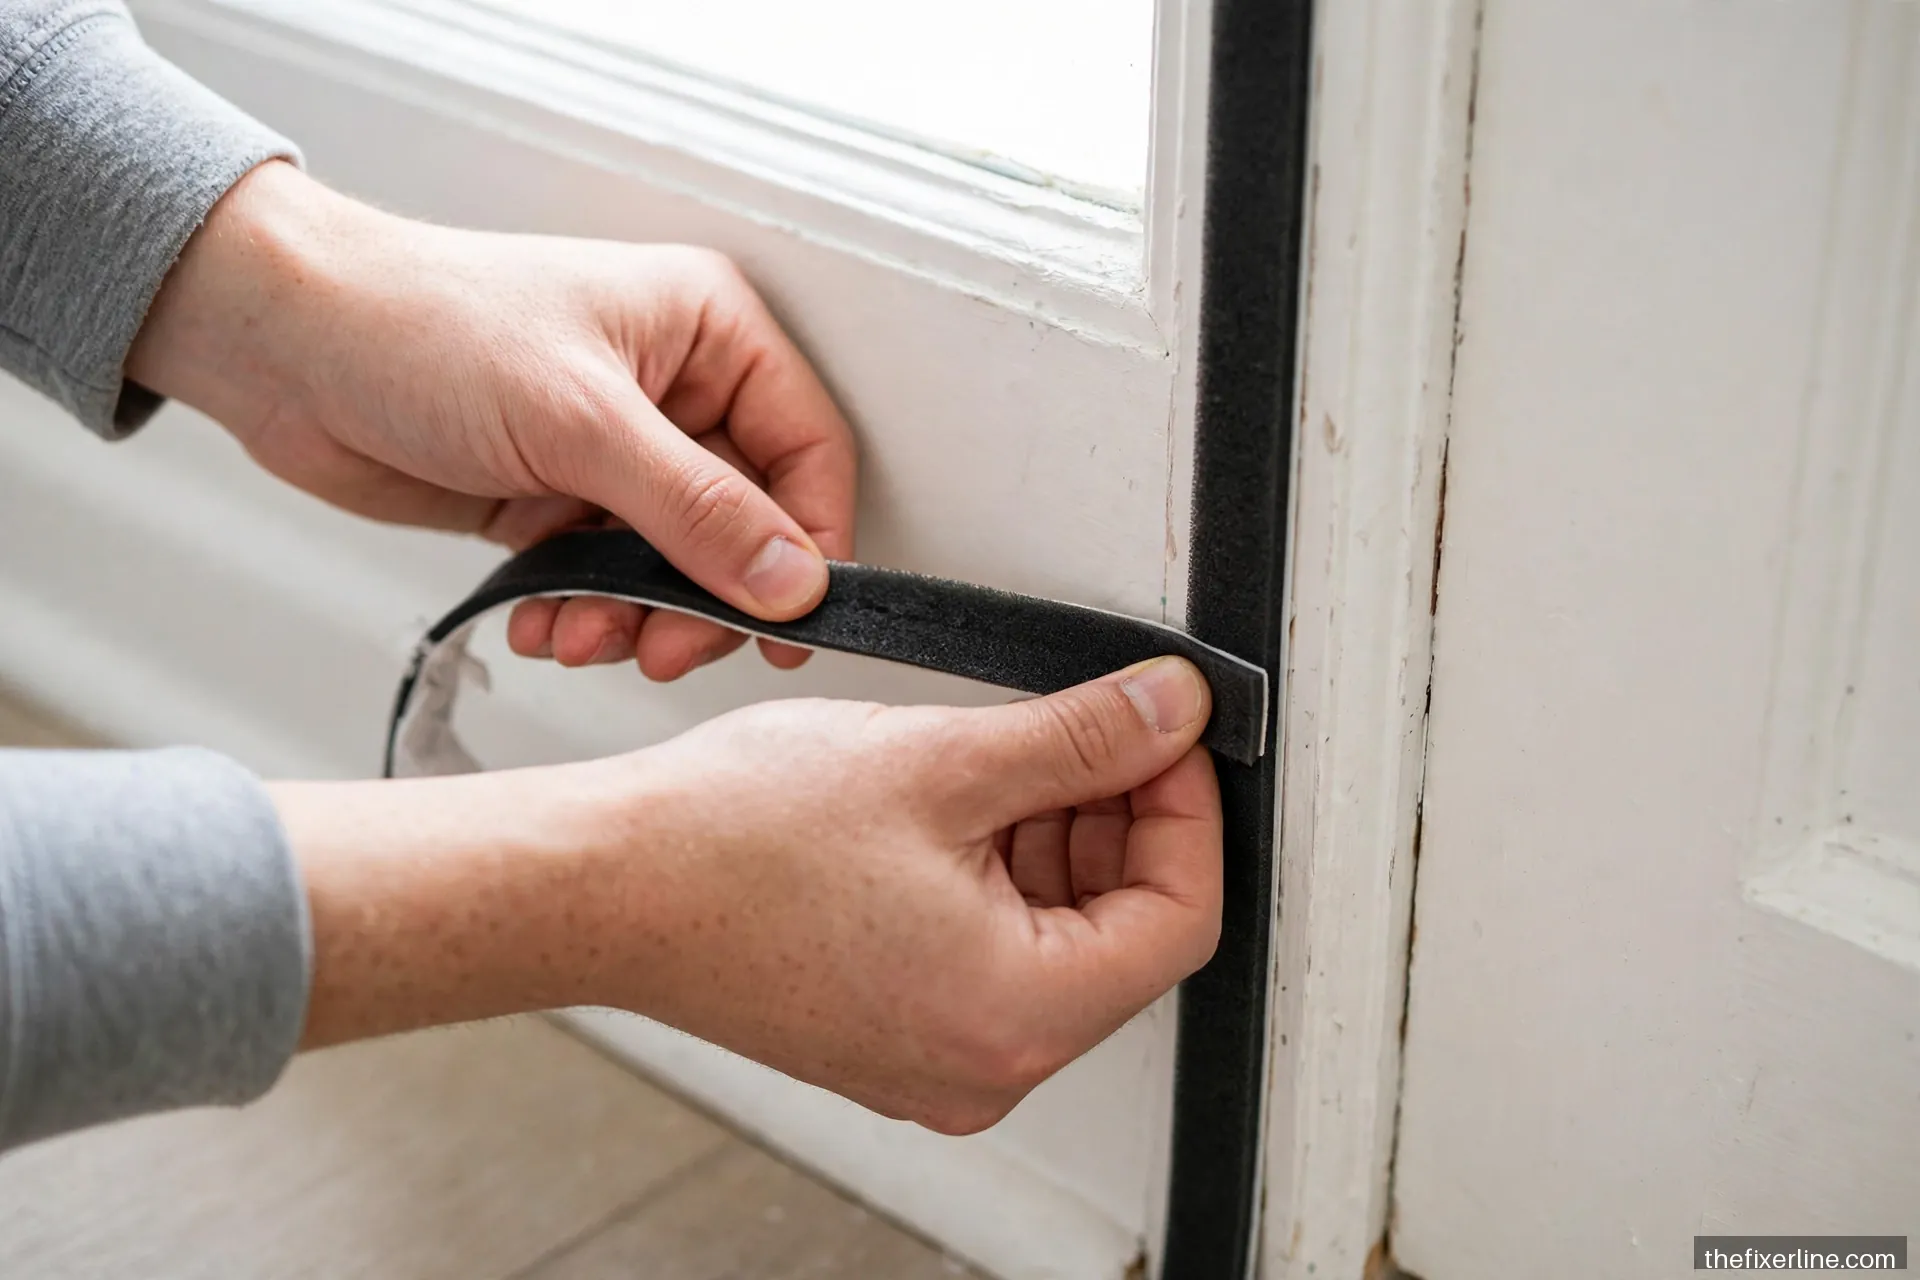
- Foam tape: adhesive-backed closed-cell foam. Good for irregular gaps and easy for beginners, but compresses permanently over time. Best for windows you rarely open.
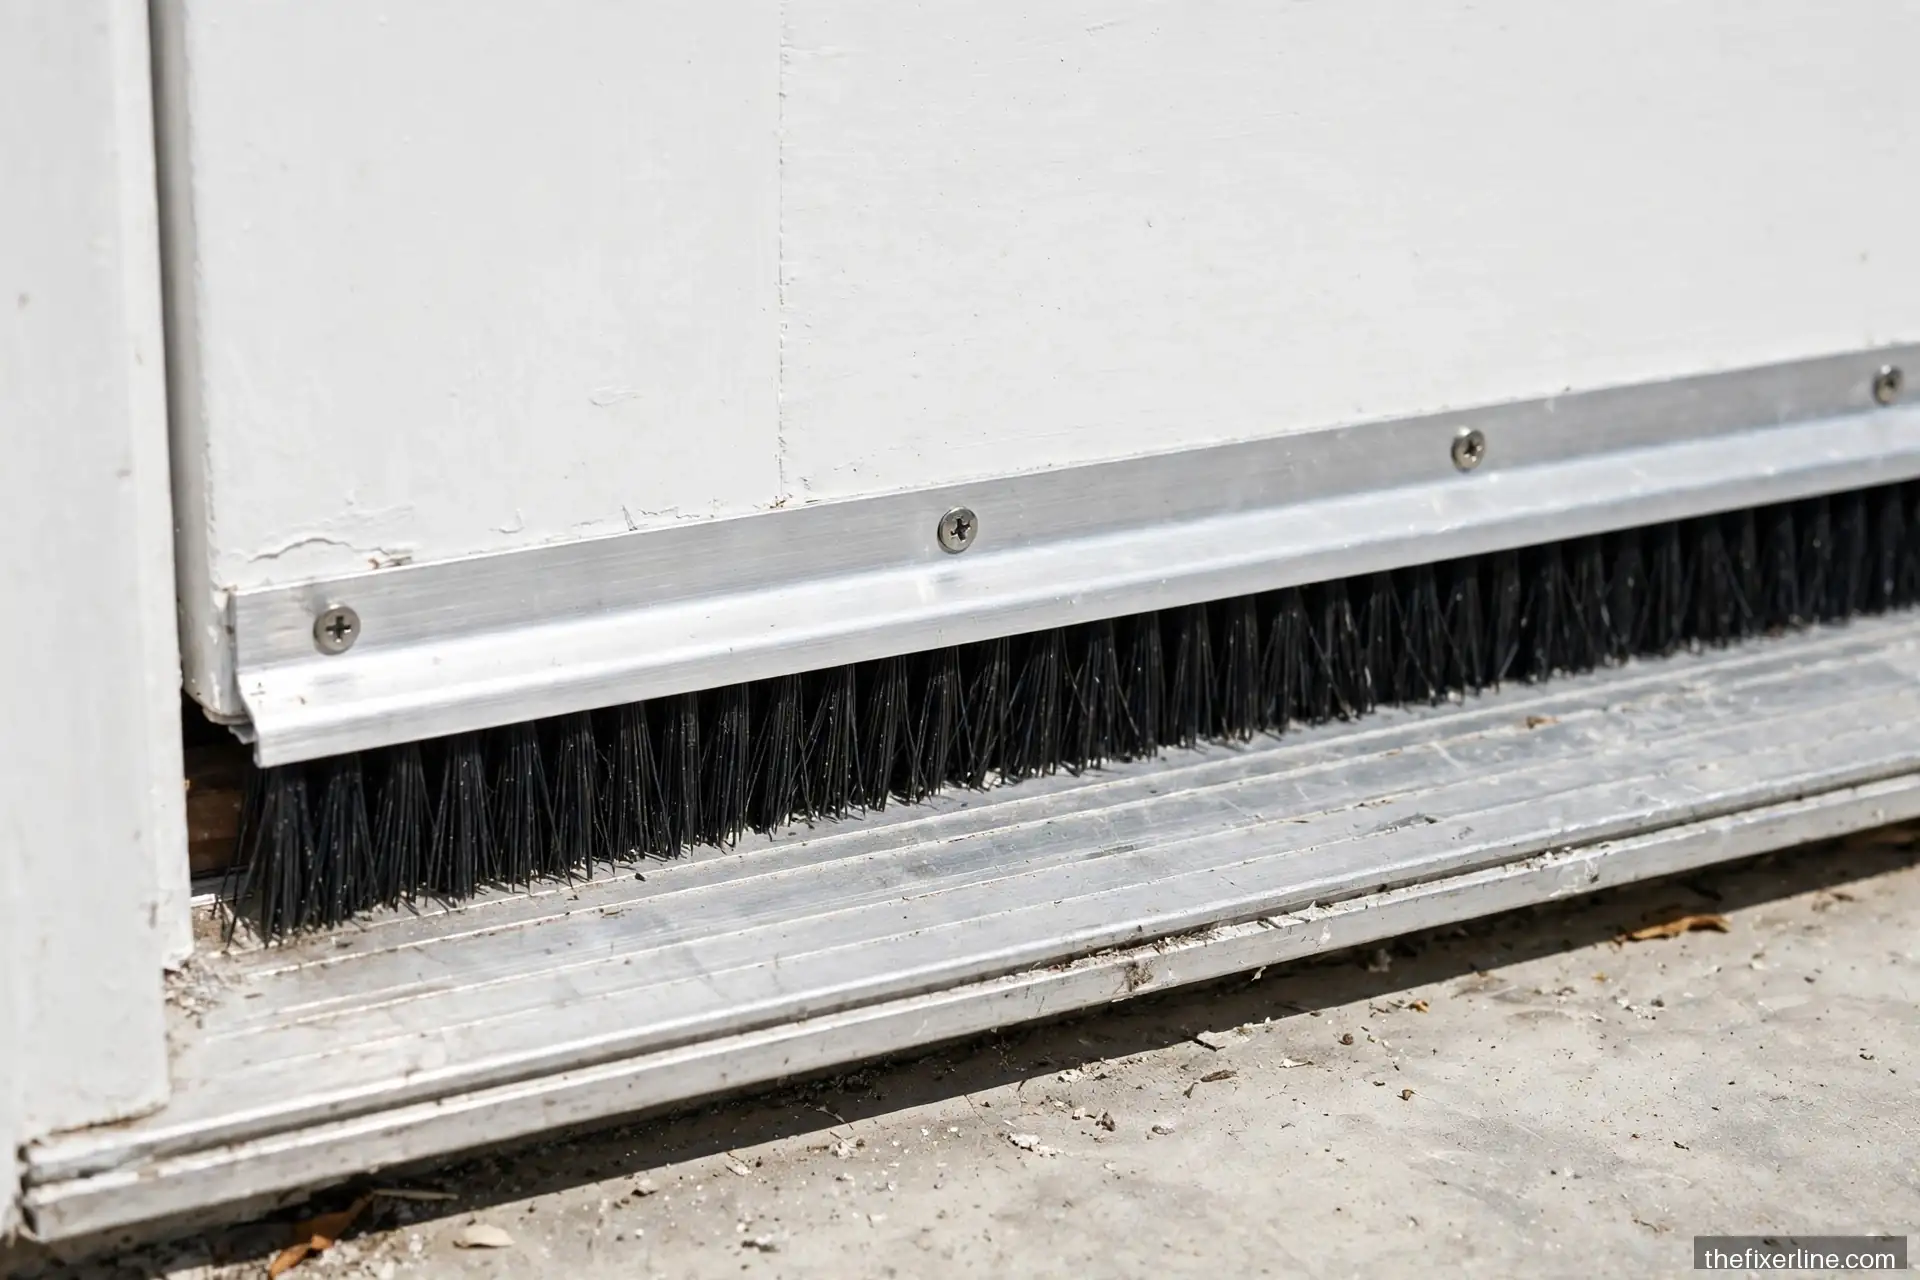
- Door sweeps: attach to the bottom of the door — bristle, vinyl, or rubber fin. The fix for under-door gaps, the single leakiest spot on most doors.
- Tubular rubber/vinyl gasket: the premium option for door frames — a hollow tube that compresses to seal. Lasts years and seals excellently, but needs a kerf (groove) or careful adhesive installation.
- Magnetic stripping: works like a refrigerator seal; excellent but requires precise alignment — best for steel doors.
Match the material to the gap size: measure your largest gaps. Foam and felt handle small irregular gaps; tubular gaskets and V-strips handle larger, consistent ones. Buying one type for the whole house is the classic mistake — doors and windows need different solutions.
Step 3: Weatherstrip doors
The frame (sides and top)
Clean the surface thoroughly — adhesive weatherstripping bonds to clean, dry surfaces or not at all. For adhesive foam or tubular gasket: start at the top, press firmly into place along the stop molding (the thin strip the door closes against), and cut cleanly at corners with a mitered or butt joint. The stripping should compress slightly when the door closes — if the door will not latch, the stripping is too thick; if you feel no resistance, it is too thin.
The bottom (door sweep)
Measure the door’s width and cut the sweep to fit. Most sweeps screw to the door’s interior face (pre-drill to avoid splitting) or slide into a kerf. Position it so the bristles or fin just brush the threshold or floor — dragging hard wears it out in months; floating above leaves a gap. Test by closing the door on a piece of paper at several points along the bottom: you should feel resistance pulling it out, but it should come free.
Check the threshold
Many thresholds are adjustable — look for screws along the top; turning them raises or lowers the threshold plate. A threshold set too low leaves a gap no sweep can fix; too high and the door drags. Adjust so the sweep just kisses the threshold across the full width.
Step 4: Weatherstrip windows
Double-hung windows: apply V-strip in the side channels (where the sash slides) and along the meeting rail where the two sashes meet. Clean the channels first — decades of grime prevent adhesion. Casement windows: tubular gasket or foam tape around the frame where the sash presses closed; casements seal by compression, so the gasket must be positioned where the sash actually lands. Sliding windows: V-strip or pile weatherstripping in the tracks. For windows you never open, a bead of removable caulk (not permanent!) seals them for the season and peels off in spring — but label them so nobody forces one open.
One caution: do not weatherstrip so aggressively that a window cannot open. Egress windows (bedrooms) must remain operable for fire safety — sealing a bedroom window shut is a code and safety violation in most jurisdictions. Check your local code if you are unsure which windows must remain operable.
Step 5: Verify your work
Repeat the incense/toilet-paper test at every location you sealed — on a windy day if possible. The paper should barely move. Then do the dollar-bill test on doors: close the door on a dollar bill at several points; you should feel resistance pulling it out all around. No resistance means no seal at that spot. Finally, check door and window operation: everything should open, close, and latch normally. Weatherstripping that prevents latching will be ripped off in frustration within a week — a seal nobody can live with is not a seal.
Maintenance and lifespan
Inspect weatherstripping every fall before heating season — it takes ten minutes and catches the failures before they cost you all winter. Foam tape: expect 1–2 years. Felt: 1–2 years. V-strip: 5+ years. Tubular rubber: 5–10 years. Door sweeps: replace when bristles are visibly worn or the fin is torn. Keep a few feet of your most-used type on hand; a mid-winter failure is a ten-minute fix if the material is in the drawer, and a month of drafts if it is not. Add this inspection to your seasonal routine — our 2026 home maintenance calendar includes it in the fall checklist.
Beyond weatherstripping: the bigger air-sealing picture
Weatherstripping handles the moving parts — doors and operable windows. But air leaks also pour through the non-moving parts of your home: attic hatches, recessed lights, plumbing and wiring penetrations, and the rim joist in the basement. If you weatherstrip every door and window and still feel drafts, the leaks are elsewhere. Caulking stationary gaps (see our caulking guide) and sealing attic penetrations are the next steps, and they often matter more than the windows. Think of weatherstripping as one layer of a whole-house air-sealing strategy, not the entire strategy.
Budgeting the project realistically
Weatherstripping is among the cheapest high-impact home projects. For planning, think in terms of material per opening rather than a house total: a door’s worth of quality gasket and sweep, or a window’s worth of V-strip, each illustratively costs in the single digits to low tens of dollars at typical retail — prices vary by brand and store. A whole-house project for an average home therefore lands, illustratively, in the tens of dollars in materials plus a weekend of labor. Compare that to a single month of heating a leaky house and the payback math becomes obvious. Buy a little extra of each type (10–15% overage) — running out mid-project on a Sunday evening is the classic weatherstripping frustration, and leftover material stores indefinitely for repairs.
Special considerations for older homes
Homes built before the 1960s present extra challenges: windows may be painted shut (free them carefully with a utility knife and a putty knife before weatherstripping — forcing a painted-shut sash breaks glass), frames may be out of square (use compressible materials like foam or tubular gasket that tolerate irregular gaps), and original wood windows deserve preservation-friendly approaches (V-strip and spring bronze weatherstripping are the traditional choices and look appropriate). If your old windows are single-pane and in rough shape, weigh weatherstripping plus a storm window against replacement — in many cases, a weatherstripped original window with a good storm performs respectably, preserves the home’s character, and costs far less than full replacement. Replacement windows are a major capital decision; weatherstripping is the smart interim step regardless.
Frequently asked questions
How much can weatherstripping save on energy bills?
Savings depend on your climate, your home’s current condition, and energy prices — a leaky older home in a cold climate saves far more than a tight newer one. Rather than trusting a generic percentage, treat it as a high-return project: the materials for a whole house illustratively run in the tens of dollars, the work takes a weekend, and the comfort improvement is immediate and noticeable regardless of the exact dollar savings.
Doors or windows first?
Doors, almost always — especially the main entry doors. A 1/8-inch gap around a standard exterior door leaks as much air as a much larger hole in the wall would, and doors get the most wear. After doors, prioritize the windows in rooms you actually heat and occupy.
I rent. Can I weatherstrip?
Removable options — adhesive foam tape, temporary V-strip, and removable caulk — leave no damage and most landlords welcome the energy savings. Keep the original materials if you replace anything, and document with photos. Permanent modifications (kerf-in gaskets, screwed sweeps) need written permission.
Will sealing drafts cause moisture problems?
In most homes, no — houses need controlled ventilation, not random leaks. But in very tight homes, reducing air leakage without ensuring adequate ventilation (bathroom/kitchen exhaust fans vented outdoors, not into the attic) can raise indoor humidity. If you see new condensation on windows after air-sealing, improve ventilation rather than re-opening the leaks. Run exhaust fans during showers and cooking — it matters more than most people realize.
What to read next
Seal the stationary gaps too with caulking 101, fix the doors themselves with how to fix a door that sticks or won’t latch, and replace torn screens with our window screen replacement guide.
Safety note: This article is general information, not professional contractor advice. Never seal egress windows shut, keep combustion appliances’ air supply in mind when tightening a home, and check local code for ventilation requirements.